Configuring Fiori Launchpad to enable selected applications to users
The objective of this blog post is to help everyone understand the process of enabling selected applications to users. In this document, we will take two applications: ‘ManageProducts’ and ‘SalesMasterDetailApp,’ which we have already created in Web IDE and deployed to the SAP Cloud Platform. ‘ManageProducts’ was created to serve USER A, who is an Inventory Manager whereas ‘SalesMasterDetailApp’ was created to serve USER B who is a Sales Specialist
Pre-requisites
- Build the applications ‘ManageProducts’ and ‘SalesMasterDetailApp’ in SAP Web IDE using templates.
- Deploy the applications to the SAP Cloud Platform
Here are quick snapshots of the procedure to deploy an application to the SAP Cloud Platform after developing it in WEB IDE.
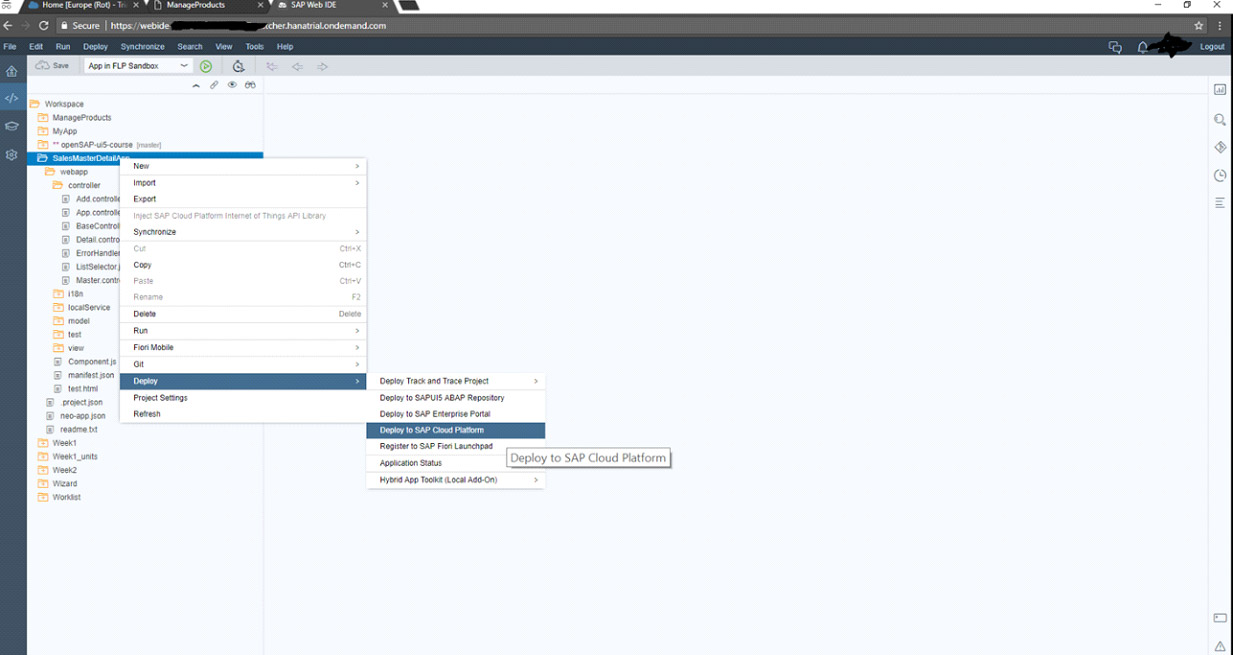
Figure 1. Deploy application to Cloud platform
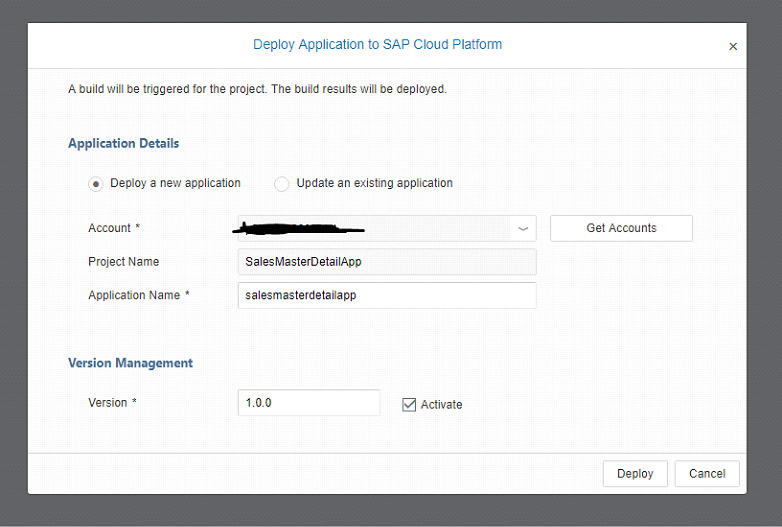
Figure 2 Deploy application to Cloud Platform
Once an application is deployed to the Cloud Platform, we can view it in HTML5 Applications list.
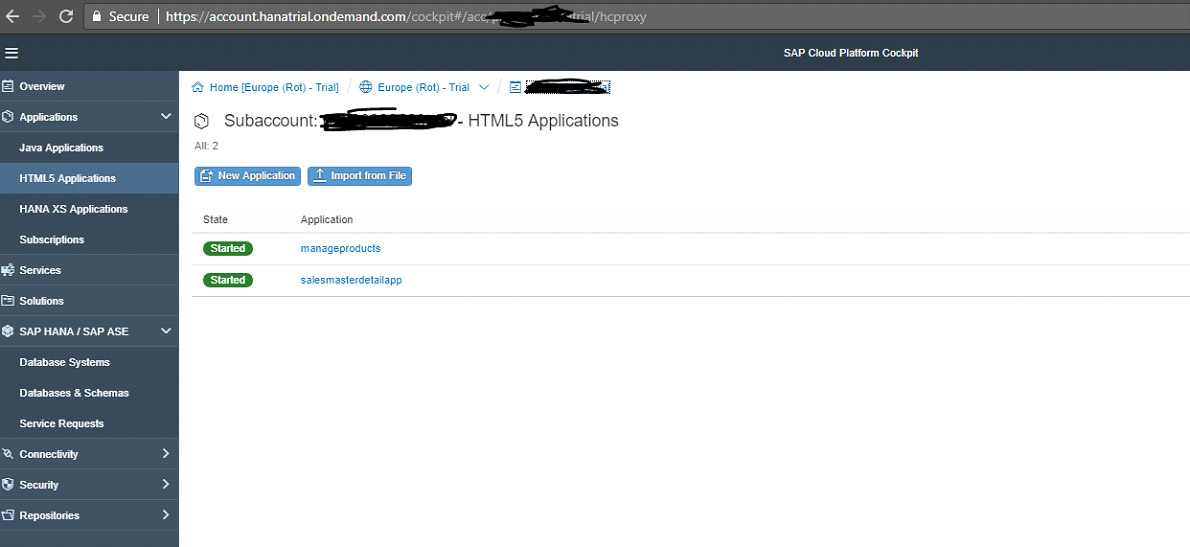
Figure 3. Deploy application to Cloud Platform
Once we are done with the above steps, we will then have to create the Fiori launchpad.
Creating Fiori Launchpad in SAP Cloud Platform
In your SAP Cloud platform account, we must first enable the Portal service for creating the Fiori Launchpad. Your Launchpad can be used with Web IDE to host apps that are deployed to the SAP Cloud Platform and registered with Fiori. Login to your SAP Cloud Platform account, Search for Portal service and enable it.
Enable Portal Service
Login to your SAP Cloud Platform cockpit and navigate to the Services page.
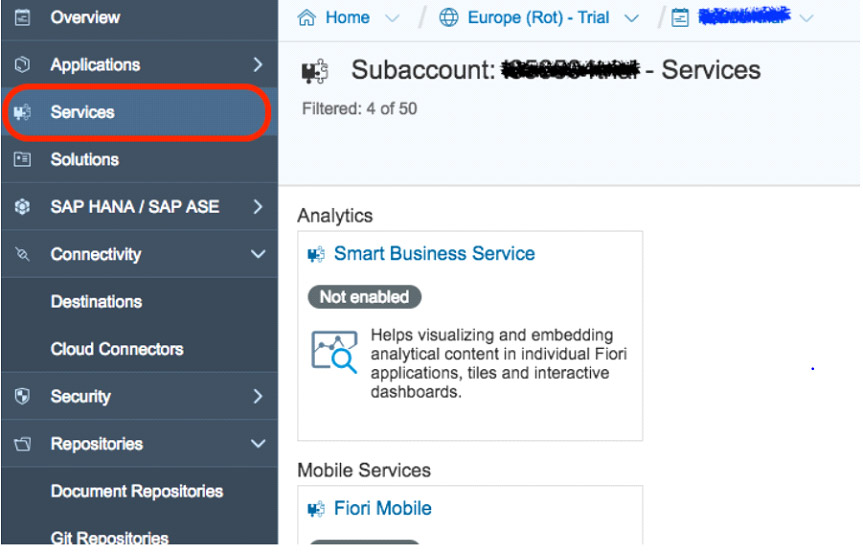
Figure 4. Deploy application to Cloud Platform
In the search menu, search for Portal and enable the service if it is not already enabled. Once you see the green Enabled status, click ‘Go to Service’ to Launch the Portal Admin Space.
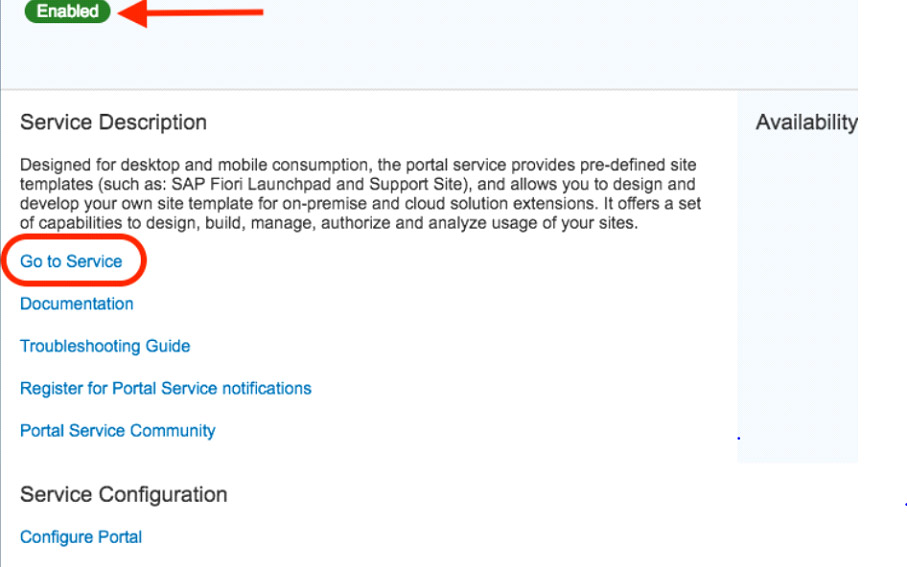
Figure 5. Service Portal
Creating Fiori Launchpad Site
In this step, we will see how to create a Fiori Launchpad Site.
Create New Site
After navigating to the Admin Space, click on the ‘Create New Site’ button.
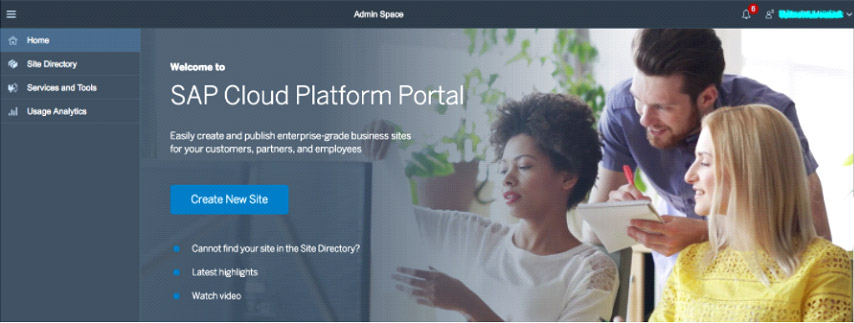
Figure 6. Cloud Platform Portal Admin Space
Enter the Site Name as ‘MyLaunchpad’, Select ‘SAP Fiori Launchpad’ as the Template Source and click ‘Create’.
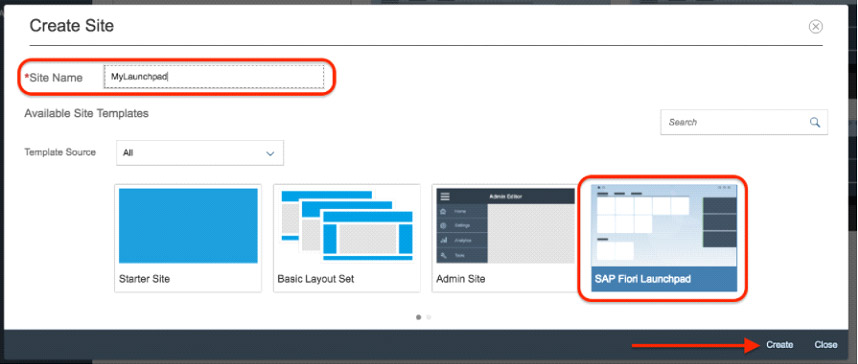
Figure 7. Creating Fiori LaunchPad site
Publishing the Site
Fiori Configuration Cockpit will be loaded after creating the site in the above step.
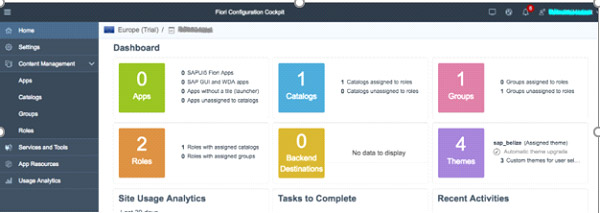
Figure 8. Configuration Dashboard
By default, the site created will be in ‘Offline’ state. Navigate to Site Directory and ‘Publish’ the site.
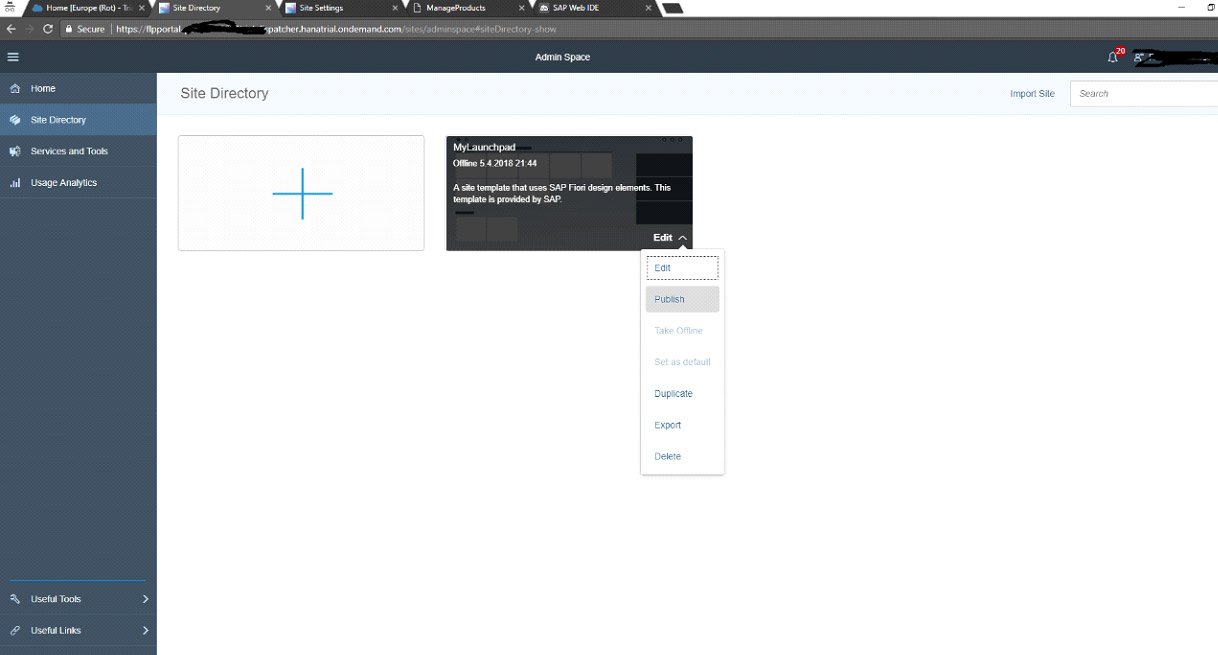
Figure 9. Publishing the site
After successfully publishing the site, we can view the end URL of the site as shown in Figure
10. By clicking on the URL, it will open the ‘LaunchPad’.
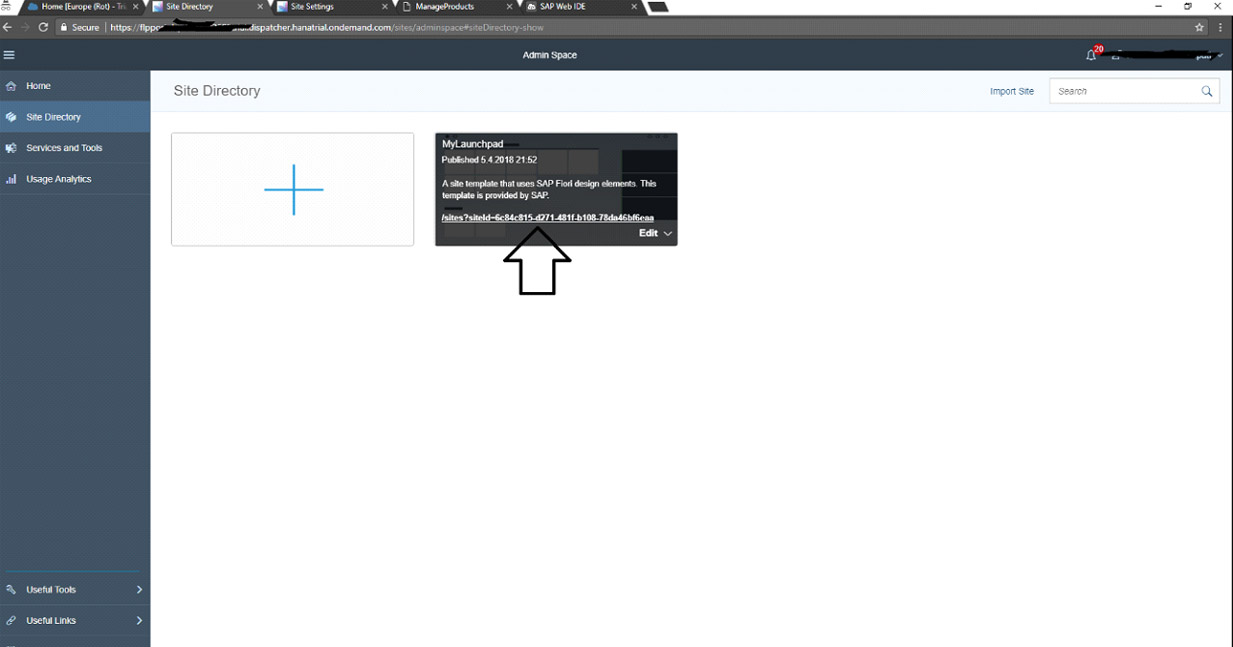
Figure 10. Finding the end URL of the Site
Here is the output of the Fiori Launchpad screen.
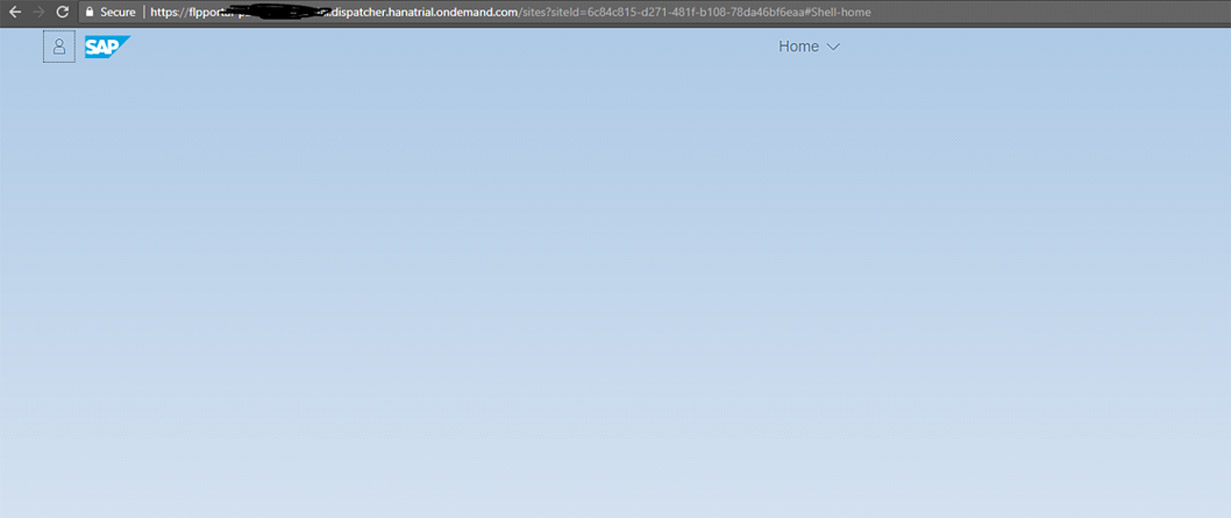
Figure 11. Launchpad Screen
Please Note: You will not see any applications at the moment, because you did not assign any applications to the Catalog, Groups, Roles and Users. We will see more details about these in the next section.
4. Setup of Catalogs, Groups and Roles in Fiori Launchpad
Fiori Launchpad is the access point for applications on mobile or desktop devices. The applications are displayed via Tiles, which will provide access to individual applications. These applications are organized through the following entities:
- Catalog: Set of applications you want to make available for one role. Depending upon the role and the catalog assigned to the role, the user can browse through the catalog and choose applications from this catalog displayed on the entry page of the Fiori Launchpad.
- Group: Subset of catalog which contains the applications visible on the Fiori Launchpad entry page. Which tiles are displayed on a user’s entry page depends on the Groups assigned to the user’s role. In addition, the user can personalize the entry page by adding or removing apps to the pre-delivered groups or self-defined groups.
- Roles: Provides access to the assigned groups and catalog.
We will now see how to create these entities and assign them to Individual users.
Creating a Role
Create a role which can be assigned to the user. Navigate to the portal services and click on ‘configure portal’.
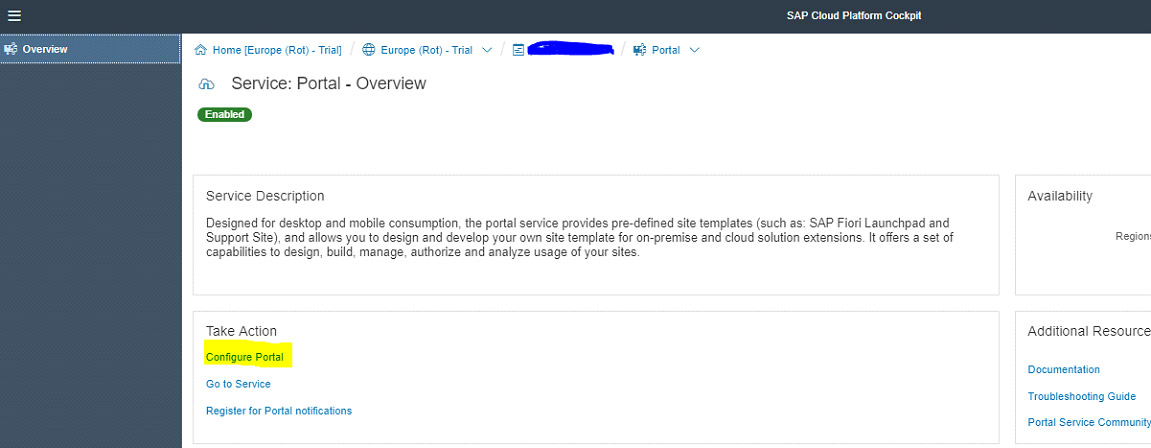
Figure 12. Configure Portal
- Click on ‘Roles’ and you will see some roles being generated automatically. Now we are going to create a ‘new role’ named ‘ZROLE1’ and click on ‘Save’.
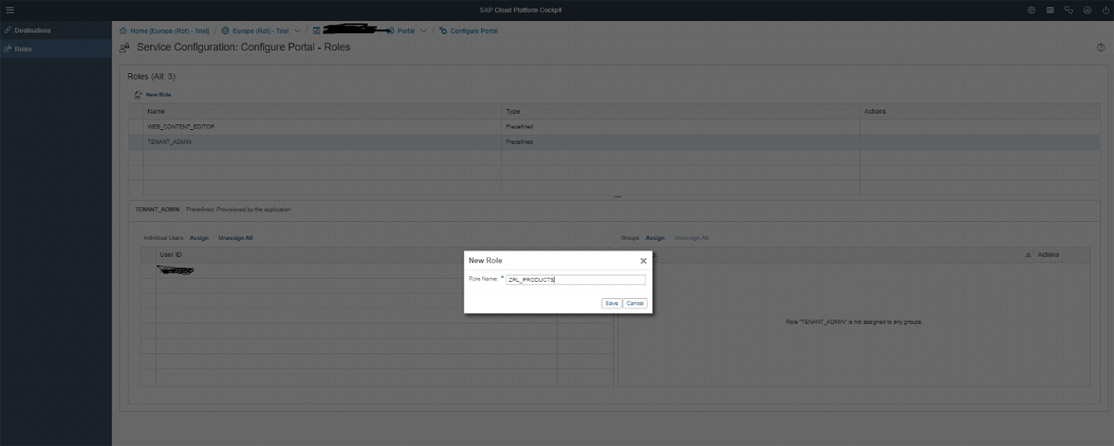
Figure 13. Creating Role
- Assign Role to user by clicking on ‘Assign’ button. In this step, assign a valid S-USERID or Cloud Platform ID. For easy reference, I have used USER A and assigned ROLE ‘ZRL_PRODUCTS’.
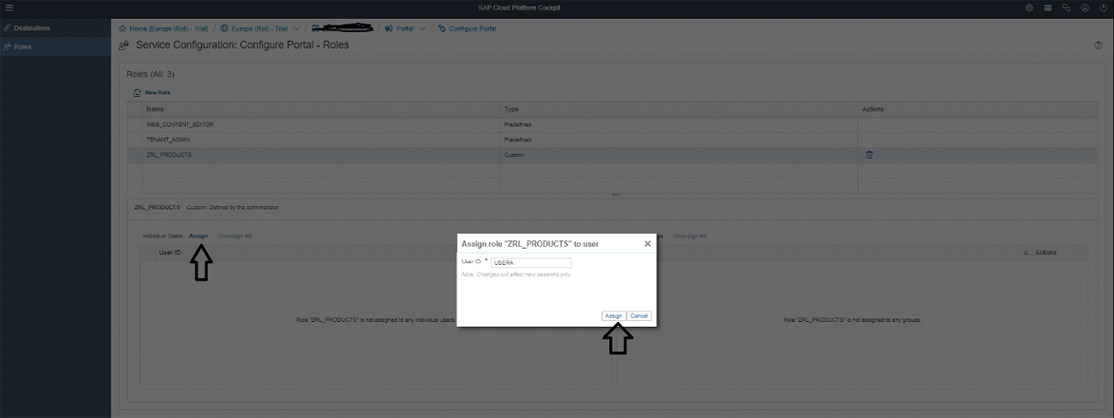
Figure 14. Assigning Role
- Similarly, create another role ‘ZRL_SALESMASTER’ and assign it to a valid User. In this case it is assigned to USERB.
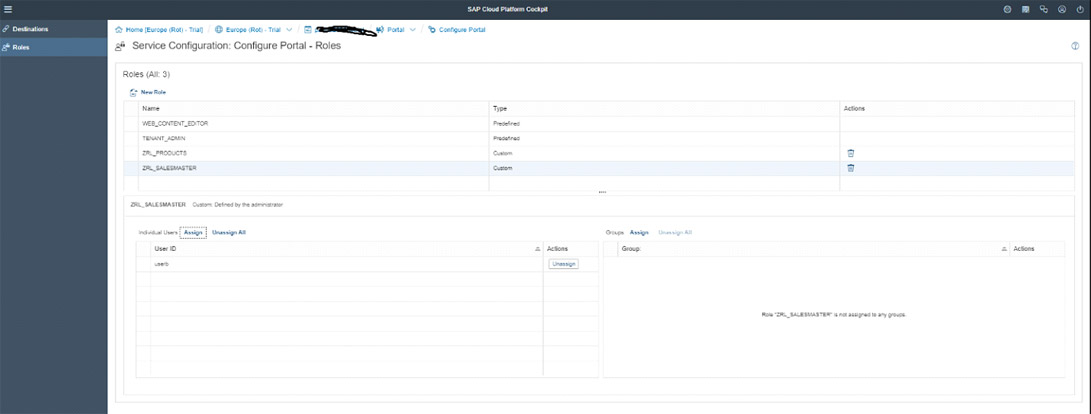
Figure 15. Assigning another Role
Creating the Application in Launchpad
Navigate to the Configuration Cockpit that is ‘MyLaunchpad’ which we have created in the previous step (Figure 10) and click on the URL.
- Select ‘Apps’ click on Add button ‘+’ and specify the details.
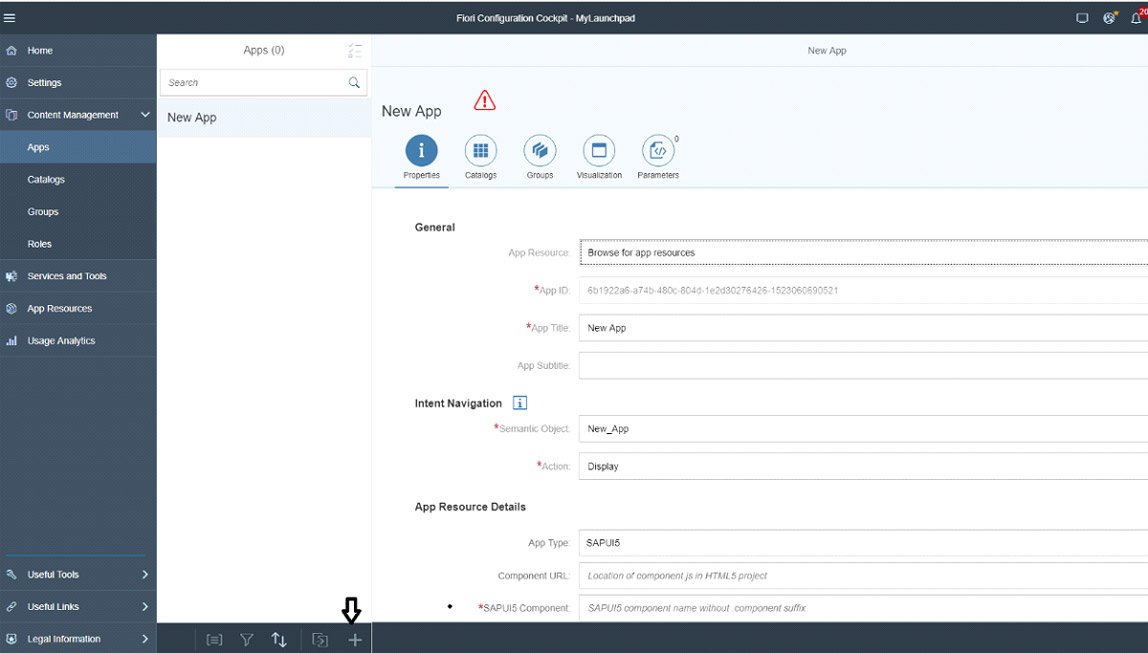
Figure 16. Specifying Application Properties
- Browse for apps and select ‘Manageproducts’ and click ‘OK’ and then ‘SAVE’.
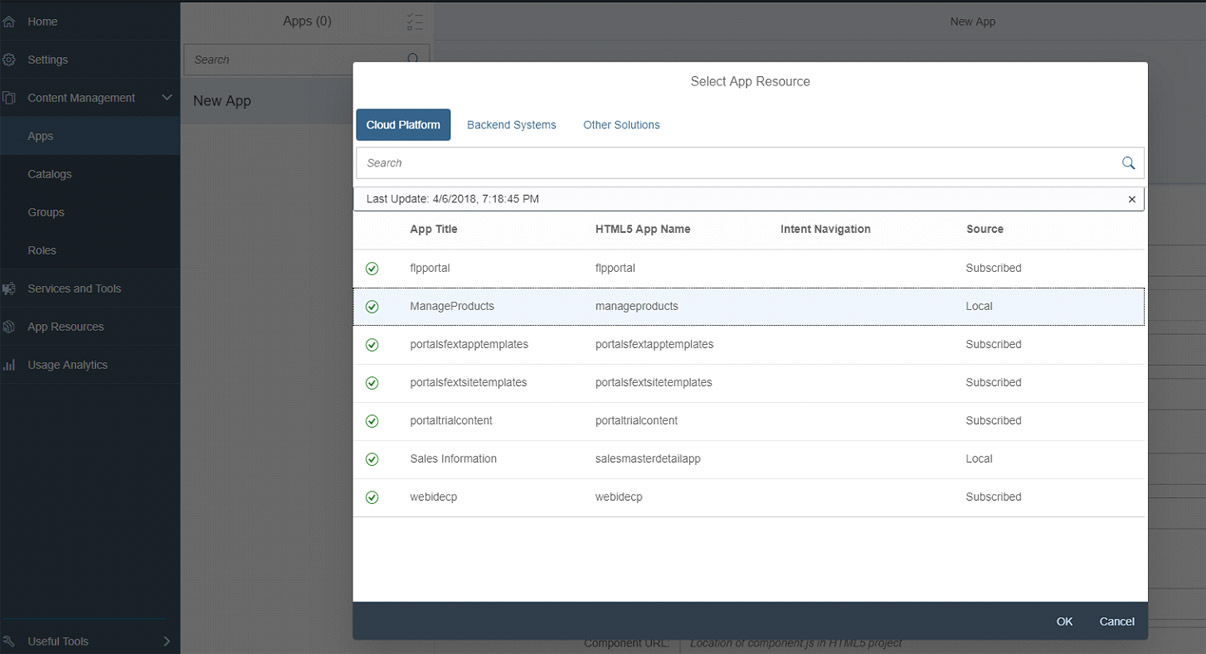
Figure 17. Assigning Applications
- Once you save, your Screen will appear as mentioned in Figure 18 to enter the properties for the application.
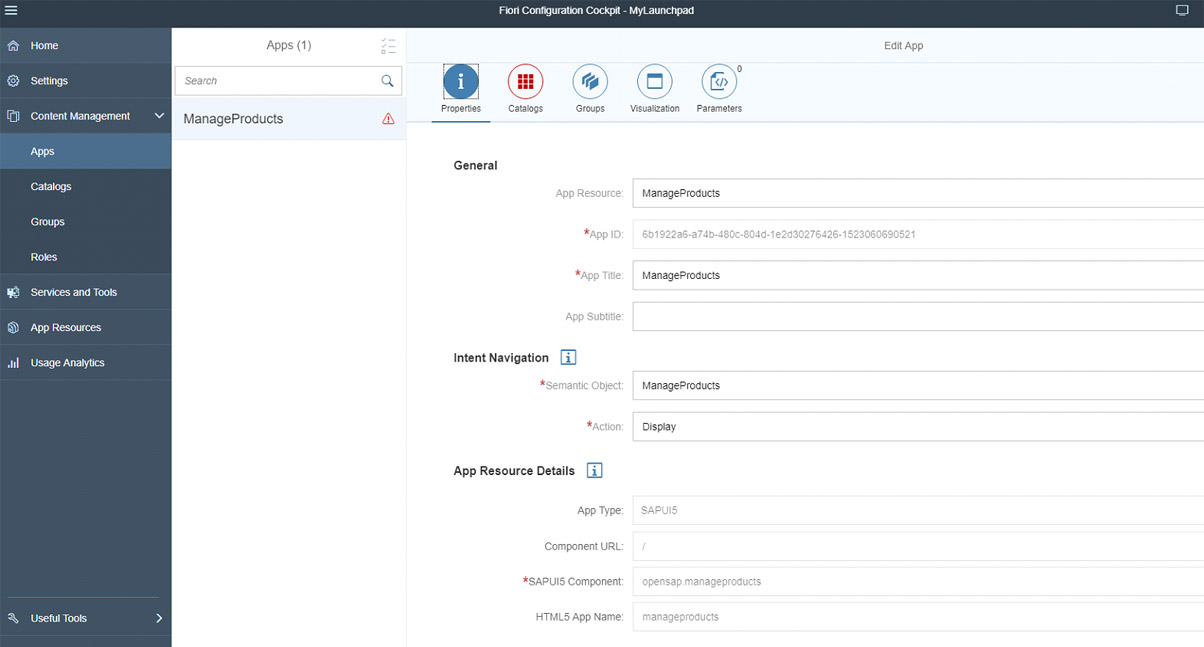
Figure 18. Complete Application Properties
Creating a Catalog
Create a catalog with all common applications and assign it to the above role.
- To create a catalog, navigate to the ‘Site Directory’ and in ‘MyLaunchPad’ click on ‘Edit’ to take you back to your Fiori Configuration Cockpit. From there, expand ‘Content Management’ and click on ‘Catalog’. In the footer, you will see an add button ‘+’. Click on that and provide the details as mentioned and click ‘SAVE’.

Figure 19. Creating Catalog in Cockpit
- Using the same Wizard, click on Apps and click then add the application created in the previous step.

Figure 20. Adding Apps to Catalog
c. Now assign our app ‘ManageProduct’ that we have created in step 2, click ‘OK’ and then ‘SAVE’.
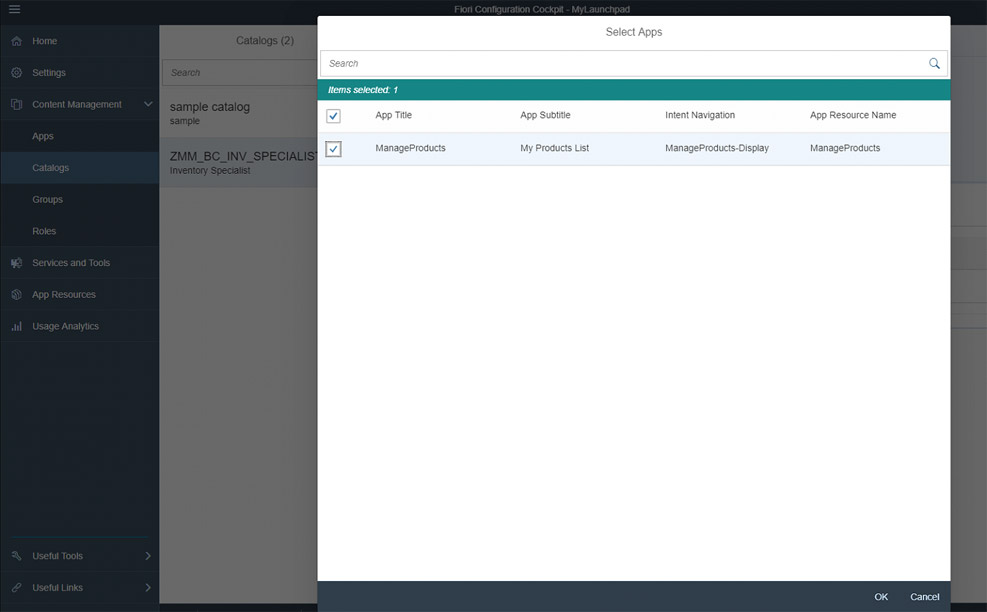
Figure 21. Browse apps into the Catalog
- Now we will be assigning Roles in the same way as the previous steps.
Click on Roles and click on ‘+’ button and select the Role ‘ZRL_PRODUCTS’ and click on ‘OK’ and then ‘SAVE’.
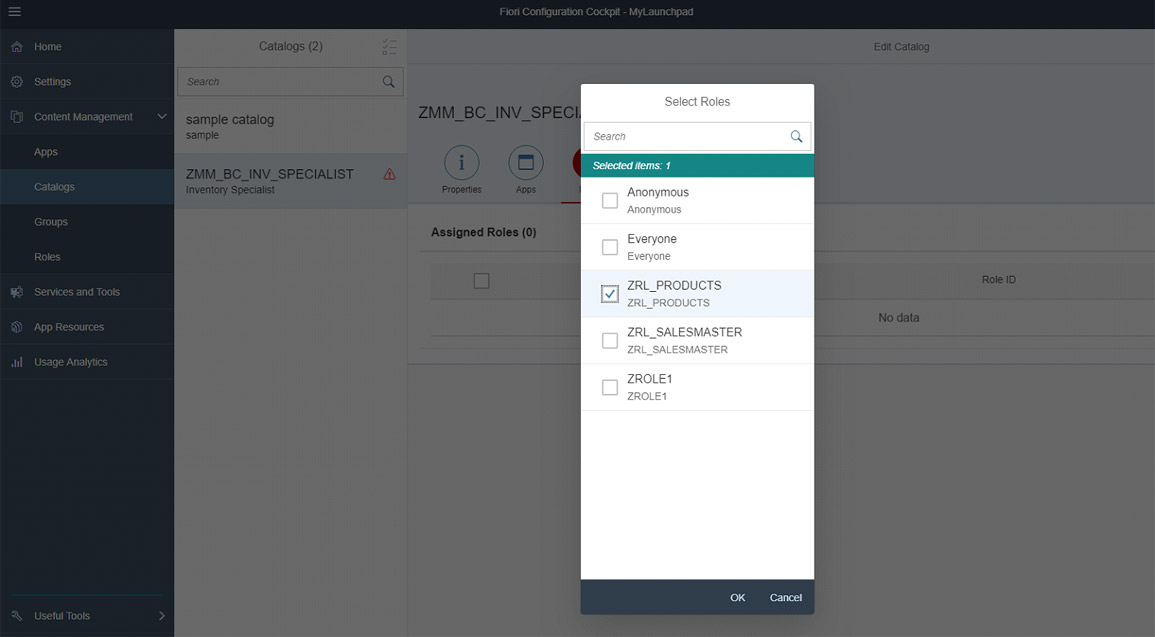
Figure 22. Assign Roles to the Catalog
Creating Groups
Create one or more groups, which will cover all the applications that are part of the catalog. This group needs to be assigned to the same role as above.
- Navigate to Groups and Create a new Group as shown in the screen below
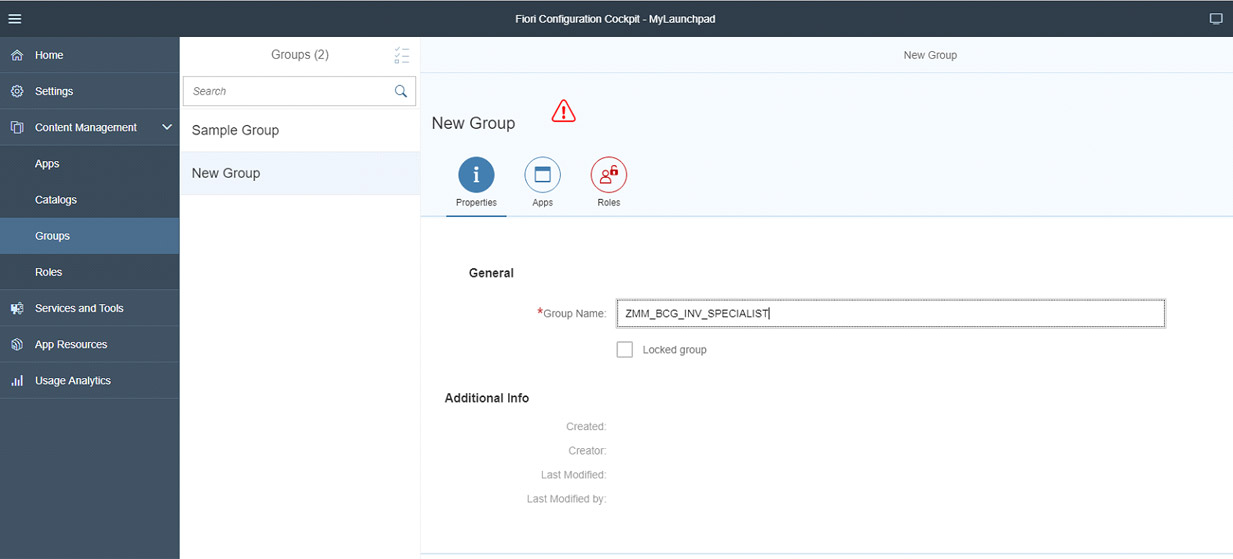
Figure 23. Creating Groups in Cockpit
- Now click on Apps and click on the Add button and fill in the details.
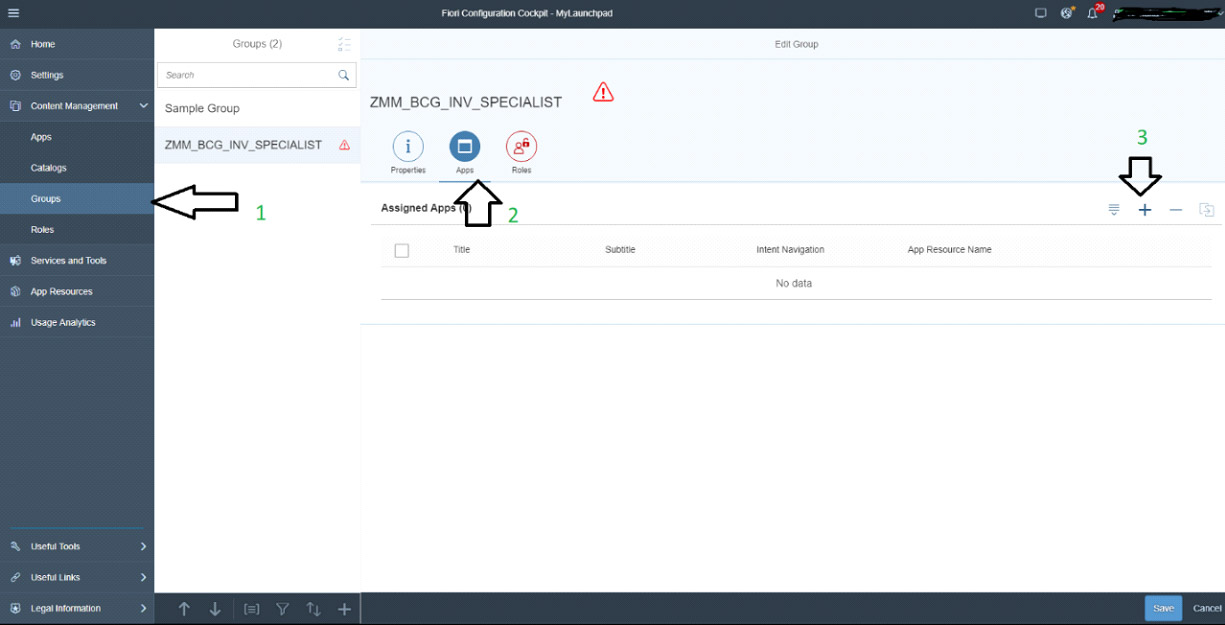
Figure 24. Assign Apps to Group
- Select our app ‘ManageProducts’ and then save.
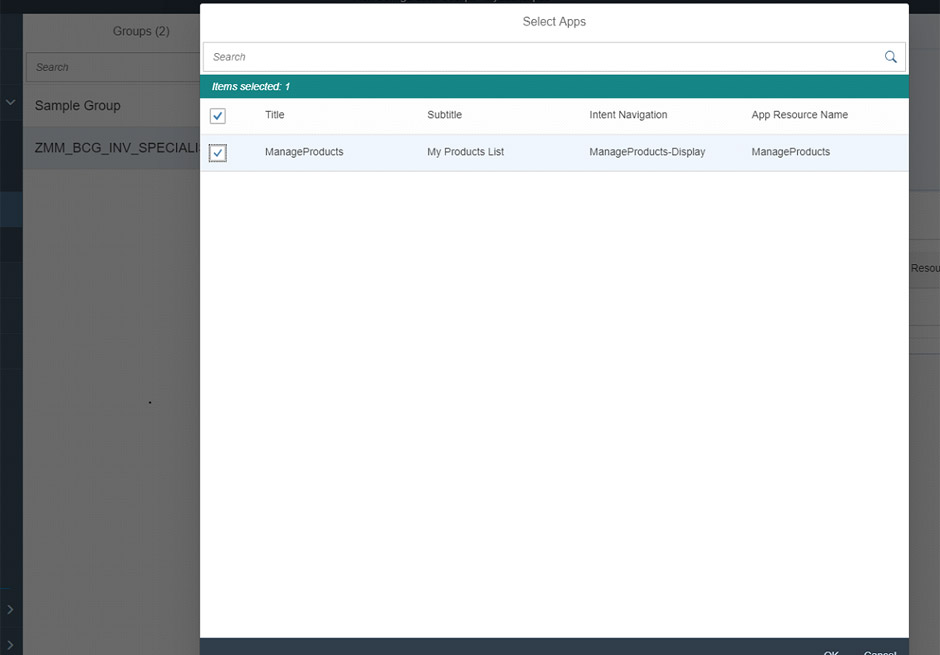
Figure 25. Browse Apps in Group
- Repeat the above steps for Role.
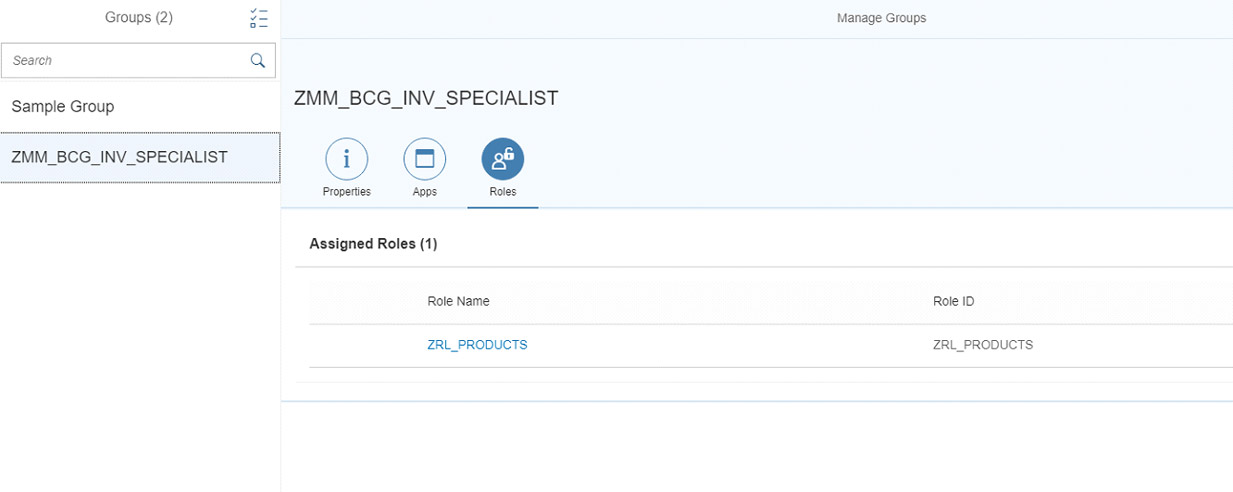
Figure 26. Assign Roles to the group
Creating another application: ‘Sales Information’
Perform the same steps for ‘Sales Information’ by creating Application ‘Sales Information’, Catalog ‘ZSD_BC_SALES_SPECIALIST’, Group ‘ZSD_BCG_SALES_SPECIALIST’ and then assign to the Role ‘ZRL_SALESMASTER’.
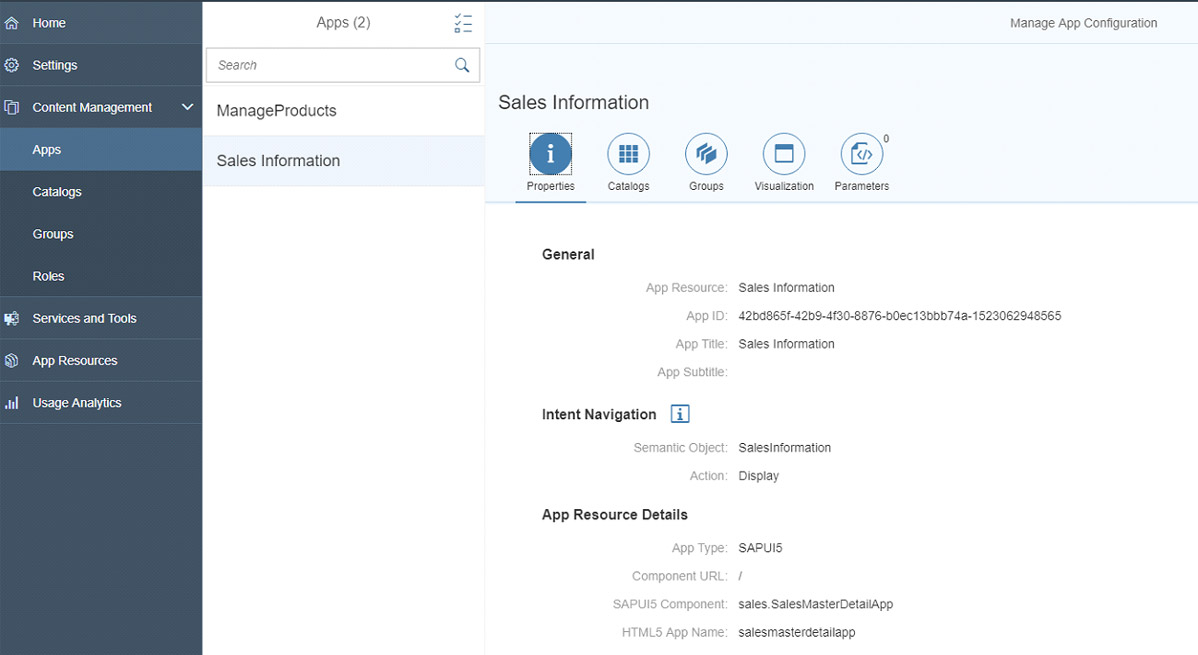
Figure 27. Create Sales Information application in Cockpit

Figure 28. Catalog for Sales Information application
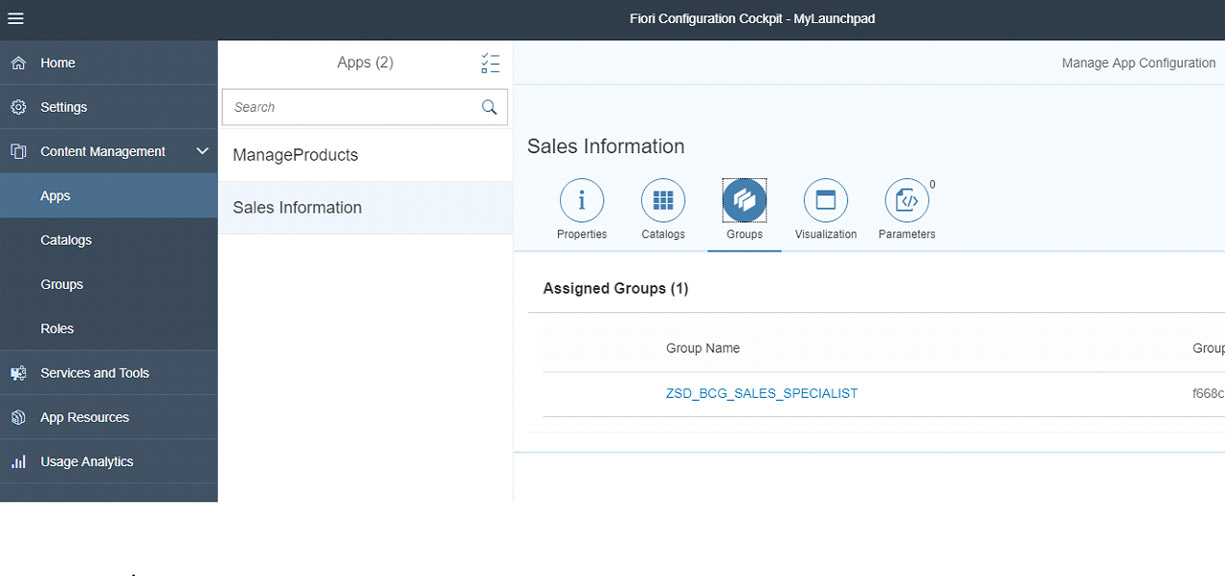
Figure 29. Group for Sales Information application
Validate the Applications
In this step, we will validate the settings we configured. As per configuration, USER A should see only one app, ‘ManageProducts,’ as this is the only app that we have assigned in the Role (ZRL_PRODUCTS) to this user and USER B should see only the ‘SalesInformation’ app.
Navigate to the launchpad and enter the credentials
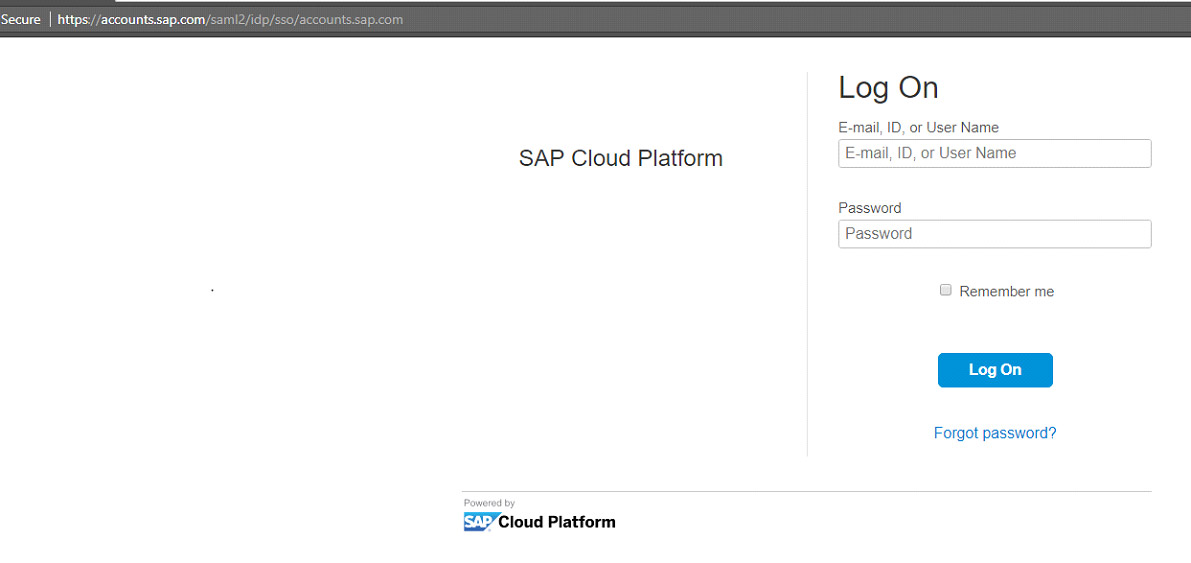
Figure 30. Cloud Platform Logon Screen
Logging in as USER A opens the Launchpad screen and you will see only the ‘ManageProducts’ app.

Figure 31. Launchpad Screen of USERA
In the same way, login with the credentials of USER B and you will only see the ‘SalesInformation’ app.
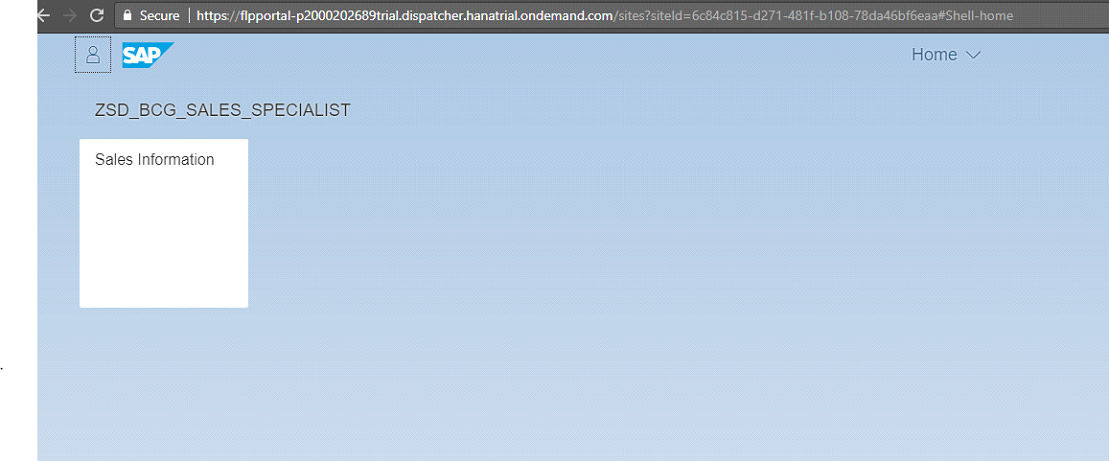
Figure 32. Launchpad Screen of USERB
If you click on that App tile, you can see the detailed information of the Worklist View.
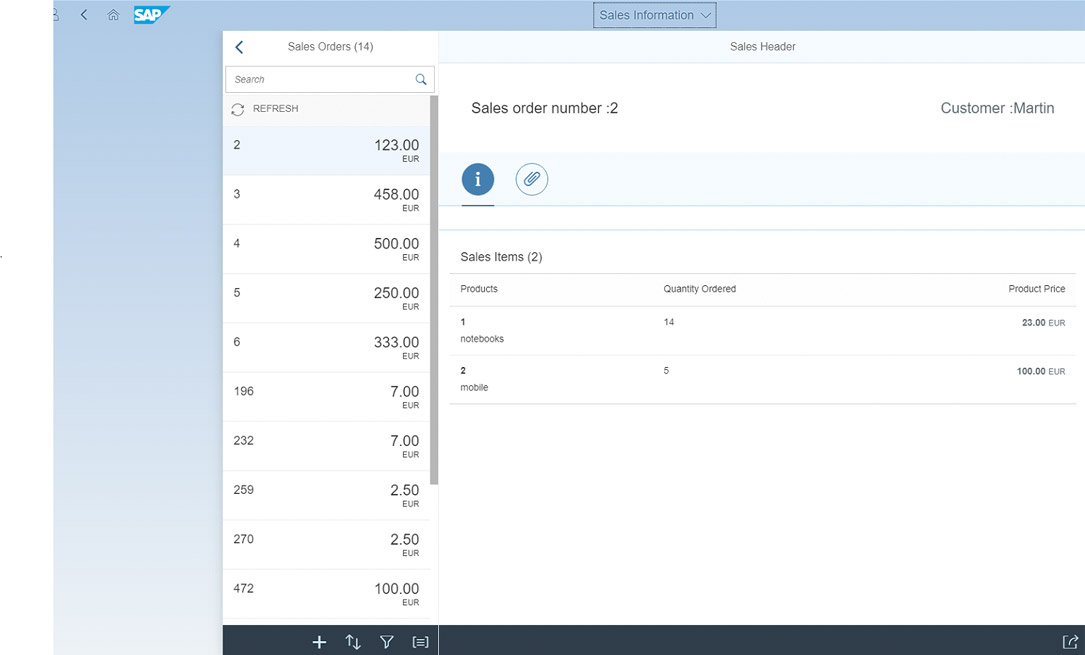
Figure 33. Detailed screen of the App
In this way, we can assign Apps to Specific Users whom we want to give access to and keep the applications secure.
Renuka Thallam is a SAP Technical Analyst at SBP Consulting